Warranties & Information
Welcome
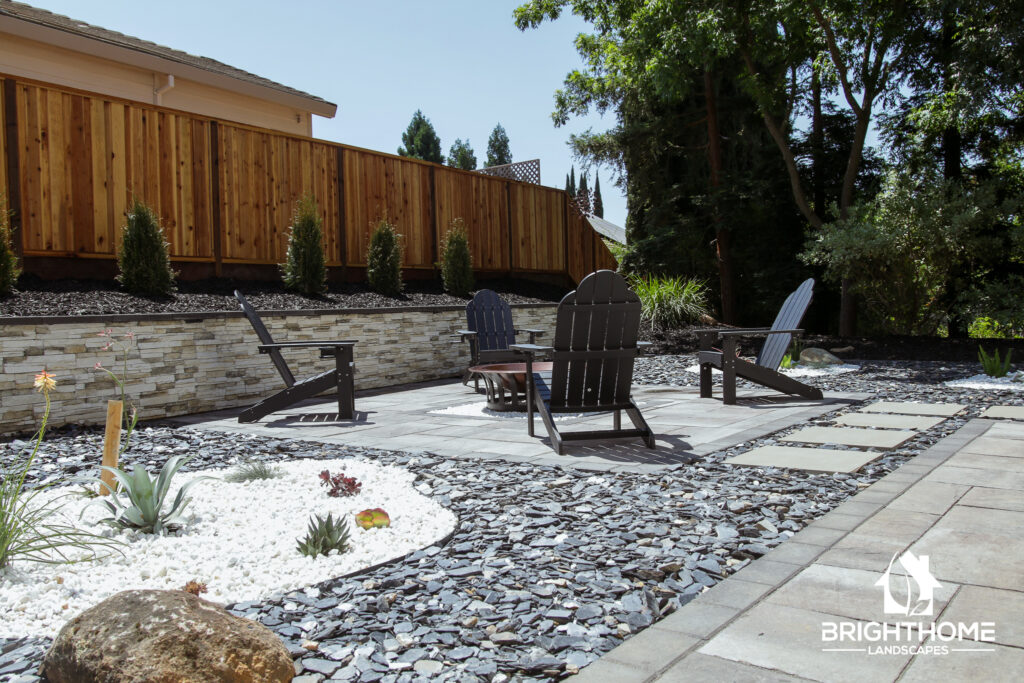
TO YOUR NEW OUTDOOR LIVING SPACE
Thank you for choosing Bright Home Landscapes to turn your yard into a living space! We like to provide all clients with a document of information regarding the process of signing an agreement for design to better assist you through the process. Outlined here will be information about what is expected from homeowners during this time, and what to expect from us here on the Bright Home Landscapes team!
IN THIS SECTION YOU WILL FIND:
The design process explained & homeowner expectations

1. Advanced Rendering
What is the purpose?
An Advanced Rendering is a conceptual design and a great tool for homeowners to use whether you are feeling unsure about what you want in your outdoor living space, or you need the blueprint to move forward. If you are someone that loves a visual, this would be a great first step for you before gearing up for construction! The design is also an amazing way to ensure that your personal stamp is in your yard.
WHAT DOES IT INCLUDE?
Scaled 3-Dimensional Design
3 Revisions
Material Suggestions
Plant Suggestions (upon request)
24″ x 36″ blueprint
WHAT ABOUT ADD-ONS?
If you are someone who loves tech, has a pesky HOA to deal with, or needs ADA accommodations, here are some add-ons for you!
Virtual Reality Walkthrough
HOA Submittal
ADA Access

2. The Design Process
First Draft
The first draft of your Advanced Rendering will be created based upon elements discussed between the designer and homeowner during the initial meeting. Homeowners are required to provide 3-5 inspirational photos prior to the start of the design process. Providing your designer with inspirational photos prior to them starting the design process is a great tool to ensure that your designer is aware of your vision for the yard, supplemented by all the ideas discussed in person.
Revisions
The first review meeting will be to discuss the first draft. The purpose of the first draft review is for the homeowner to let the designer know which elements in the design to keep, and which elements might need to be reworked or changed to better represent the homeowner’s vision. It is important to note that the first draft is just a draft and will require the homeowner’s input as a necessary step to ensure the design
is heading in the right direction towards a final draft.
Homeowners receive 3 revisions to ensure the space entails everything that is needed.
Completion
Once the design is completed and agreed upon by the homeowner as being an accurate conceptual representation of the desired outdoor living space, the designer converts those conceptual plans into a PDF blueprint and submits it for printing. Homeowners are provided a 24″ x 36″ blueprint of the designed outdoor space with accurate information regarding materials and square footage. This blueprint can then be used for construction and installation. Also, your design fee can be rolled into the cost of construction!
3. HOMEOWNER EXPECTATIONS
WE DON’T ASK FOR MUCH!
Communication between the homeowner and designer is crucial during this process. Please be available during the design phase to answer any questions the designer might have regarding choices in materials, ideas, and questions about needs and expectations of what is to be provided in the conceptual design. The preferred method of communication is via email as it can be referenced at later dates and is a great tool for summarizing what was discussed at appointments.
If the designer cannot contact the homeowner during this phase, the designer will not be able to meet those expectations in an accurate or timely manner.
It is the homeowner’s responsibility to gather required documents for HOA/CC&R requirements that the community must follow. The designer creates the conceptual design based on the HOA/CC&R requirements provided to them by the homeowner. Homeowners are responsible for submitting the blueprints and HOA required material to their HOA community. The designer will update the design to comply with the HOA/CC&R rules if additional feedback is received after the application submittal.
Congrats!
TO YOUR NEW OUTDOOR LIVING SPACE
IN THIS SECTION YOU WILL FIND:
Important reminders, homeowner expectations, and installation process
1. CONSTRUCTION AGREEMENT
WHAT IS THE PURPOSE?
Once homeowners go through the Advanced Rendering process, create a conceptual design with their designer, and decide materials to be used for installation, then it is time for construction! Choosing Bright Home Landscapes to bring your dream yard to fruition ensures that your installation will stand the test of time. Homeowners work hand in hand with a dedicated team comprised of your Project Designer, Project Manager, and construction crew to walk you through the process from start to finish.
The purpose of the Construction Agreement is to provide homeowners with specifications for installation such as: landscape, stones and concrete, and synthetic turf. Each page of the agreement needs to be thoroughly read by both the homeowner and the designer during the process of signing.
Homeowners have a 3 Day Right to Cancel the agreement, which can be waived at the time of signing. After three days, the administrative team prepares and submits material orders specific to the project.
2. Important Reminders
PREPARE YOURSELF FOR CONSTRUCTION!
USA DIg:
The Project Designer is responsible for spraying the property for USA Dig. Our administrative team submits the ticket. This process ensures that when the crew gets onsite for installation, they are aware of where the gas, electrical, and water lines are.
Construction Equipment:
Projects can vary as to what equipment will be needed for the installation. Please expect heavy equipment and machinery to be on site during construction.
Portable Toilet:
Portable toilets should always be present on site during construction for the crew members to use and will remain on site until the end of construction. Our vendor does service cleaning routinely.
Construction Crews:
Based on size and the scope of work, some days of construction may only warrant one member of the crew being on site. If you have questions or concerns regarding this, it is important to check in with the Project Designer to inquire why only one member would be needed that day.
Material Deliveries:
Homeowners only receive the amount of material outlined in the agreement. Any leftover materials are returned to the vendor and are not for the homeowner to keep. With pavers specifically, our administrative team always orders an additional amount to account for defects or breakage.
Material Availability:
Homeowners should note that construction can be heavily dependent on the availability of materials. If you fall in love with a product that is not available or has a long manufacture time, consider consulting with your Project Designer on different material options. Lead times can be impacted by material shortages, so it is encouraged to choose materials that are currently in stock to avoid extending the wait for installation. Bright Home Landscapes requires homeowners to view material choices in person to ensure that the product on order is accurate to the homeowners’ wants. A written confirmation via email needs to be received in the office that the homeowner has confirmed the material choice in person at the vendor’s yard before delivery.
HERE IS A LIST OF VENDORS FOR YOU TO CONFIRM YOUR CHOICES
Hastie’s Capitol Sand & Gravel
9350 Jackson Rd, Sacramento, CA
Rock Pros Landscape Supply
2920 Lesvos Ct, Lincoln, CA
A&A Stepping Stone
Search the location nearest you!
Brickyard Building Materials
8988 Elder Creek Rd, Sacramento, CA
Resource Building Materials
9411 Elder Creek Rd, Sacramento, CA
Normac Inc
3449 Longview Dr, Sacramento, CA
IMPORTANT REMINDERS CONTINUED... THERE ARE LOTS!
Start Dates & Line Ups:
Once a Construction Agreement is signed and the deposit paid for, the homeowner is placed in line for construction. Our administrative team is responsible for sending clients updates as to their current wait time and assigning start dates based on product and crew availability. Most homeowners should expect to receive a tentative start date that is subject to change, followed by a confirmed start date. A confirmed start date will include a specific date and time for the Initial Walkthrough with the homeowner, Project Designer, Project Manager, and construction crew. Following that, expect updates from the Project Designer or the administrative team regarding crew schedules and timelines for construction.
Weeds & Weedblock:
We would like to make note that weed fabric is a preventative measure, not a permanent solution to weed growth. Weed fabric is designed to help mitigate excess weed growth, however, it is not going to completely stop weeds from growing. Homeowners should expect the possibility of weeds in any landscape design.
Dealing with the Unforeseen:
Once we start prepping the ground for construction and installation, the crew might come across issues that couldn’t have possibly been seen. We would like to let every homeowner know that they should be expecting the unforeseen during any time of construction or home improvement. When an unforeseen issue arises, it can extend construction times, or even impact the conceptual design. An example of an unforeseen that might be present during construction would be roots or improperly laid gas/electrical lines.
Who Do I Call?:
It is important to us here at Bright Home Landscapes that homeowners are aware of who to ask questions or address concerns with. We want our clients to feel confident that they know who to turn to for all matters regarding their project. If you have questions to ask, or concerns to address, please address those to your Project Designer, the administrative team, or the Project Manager. Everyone on our team is readily available to help during normal business hours. The office operates every weekday from 8am-5pm. If you still aren’t sure who to call, check in with the office and they can direct you to the appropriate party.
Plant & Sod Installation:
Homeowners need to be aware that plant and sod installation/growth can be affected by animals. Bright Home Landscapes is not responsible for plants or sod that have been damaged by pets. Please be aware that pet urine can damage the living elements of landscaping and to be mindful of keeping animals out of those areas, especially during their initial growth.
3. Homeowner Expectations
WHAT YOU CAN DO TO HELP US
We would like to inform you, as the homeowner, about the expectations we appreciate our clients meeting during the construction process. These expectations help to ensure that the process of construction runs smoothly and limits the possibility of miscommunication as to what we need from homeowners during this process.
Personal Items:
Homeowners need to remove any/all personal items that they want to avoid damaging in the construction zone. The construction zone specifically references any area in the space where installation will be done. Keep in mind, the construction zone includes all entrances/exits of the surrounding area. Items that should be removed would be furniture and plants, however it is not limited to just those. If plants are in the construction zone, please move them to a safe area if you would like to save them for replanting or talk to your Project Designer about payment for plants being safely removed and replanted by our crew onsite.
Plants:
Plants are to be chosen, purchased, and provided by the homeowner for crew installation. Homeowners are responsible for getting plants on site in an appropriate time frame for the crew to install. The Project Designer will coordinate with the homeowner regarding plant selection and a timeline to get the plants onsite.
Directing Construction Crews:
Homeowners are not allowed to direct the crew or change plans without consulting with their Project Designer. All changes to scope of work need to be approved through the Project Designer and Project Manager.
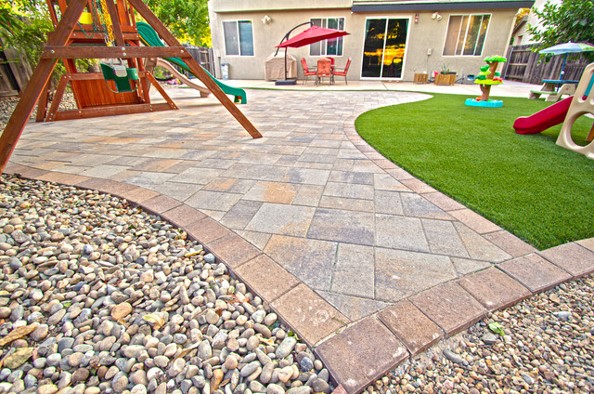
4. INSTALLATION PROCESS
A brief breakdown on pavers
1.Demolition, excavation, & set grades
We remove the existing hardscapes and excavate the area to a depth of 9 1/2″ for driveways and 7 1/2″ for walkways/patios from final grade, removing all unstable ground and setting proper surface grades.
2. Soil compaction and geotex fabric
We compact the native soil to ensure the beginnings of a firm foundation and install a geotex fabric to further stabilize the native soils and prevent undulations.
3. Base rock
We install 4″ – 6″ of class 2 base over the entire area, which creates a stable yet flexible foundation.
4. Compaction
Using a plate vibrator, we compact the class 2 base to a density of 98% to create a firm foundation and eliminate the possibility of sagging.
5. Bedding sand
The sharp angled sand acts as a cushion for the pavers and creates the interlocking mechanism for the paving system.
6. Screeding
The area is evenly covered with 1″ of specially manufactured bedding sand and smoothed out.
7. Pave stones
The stones of your choice are individually laid by our craftsmen to create the everlasting image of your dreams.
8. Cuts
All edge stones are cut with a masonry saw. Utilizing a Diamond Carbite blade, we create clean, accurate edges for the desired shape of your project area.
9. Bond beams and borders
A concrete footing is laid around the edges to prevent lateral movement of the sand set field stones. Border stones are then wet set on top of the concrete footing.
10. Paver compaction
The pavers are plate vibrated into the 1″ bedding sand to begin the interlocking process.
11. Sand joints
Dry finishing sand is swept into all joints of your entire project area. The finishing sand will enhance the interlocking mechanism.
12. Final compaction
The project area is once more plate vibrated to ensure the sand fills the entire joint.
AT THE END OF EVERY PROJECT…
We ensure the project area is thoroughly cleaned and ready for the homeowner to start enjoying!
Congrats!
TO YOUR NEW OUTDOOR LIVING SPACE
Congratulations on your completed outdoor living space with Bright Home Landscapes! We like to provide all clients with a document of information regarding aftercare and items to be mindful of now that construction is finished, and your outdoor living space is completed. Outlined here will be information about what is expected from homeowners during this time and information to better assist in caring for your living space after our team leaves.
Sod Care
WATERING
It is crucial to be aware of the type of sod that has been installed in order to follow proper care needs.
Watering practice for new sod will depend on the time of year. For the first month after sod installation, the soil should be moist to wet. To see if the sod is taking root, pull back the sod and look for white roots going into the ground. If white roots are present, that is an indicator that the water schedule has been sufficient. The best indicator that the sod is in need of an updated water routine is the presence of wilting. If the sod is wilting, it will have a dry, dusty, or grey appearance. A lack of wilting indicates that the water schedule is sufficient. Properly watered sod will appear lush, full, and green.
Here are some tips for watering:
To keep the soil continuously moist, water lightly and frequently 2-3 times a day for the first 4 weeks.
Early morning and late afternoon/early evening are the best times to water. Do not water in the middle of the day or late in the evening.
Ensure that the new sod has enough water on hot, dry, and windy days.
Avoid drowning the sod. This can result in the development of a shallow root system that becomes susceptible to bugs and heat or drought stress.
Check the edges/perimeter areas of the sod to ensure those areas are getting enough water. These areas are usually first to struggle due to a lack of watering.
Mowing
Mow the sod as soon as it becomes tall enough. If the ground is saturated in water, do not mow as it will leave tracks/footprints.
Do not mow off more than 1/3 of the total height of the grass.
Leave the grass clippings on the sod as they add fertilizer to the sod and enrich the soil.
Fertilizing
Apply a Start Fertilizer to the sod right after installation. The fertilizer should last 6 weeks. Apply the Starter Fertilizer again after the first 6 weeks.
Fertilizer should remain on the new sod for the first 12 weeks. After 12 weeks, the fertilizer schedule will depend upon the time of year and the type of sod.
Paver Care
TIPS FOR PAVER MAINTENANCE
Each spring, clean the pavers with a coarse stable broom and a routine paver cleaner to keep them looking new.
Some weeds, if left unaddressed, can shift pavers apart over time. Be sure to periodically apply a granular weed preventative between joints as a part of your paver maintenance routine.
Be careful when choosing to use a power washer to clean the pavers as they can remove the paver finish and expose the aggregate on the paver surface.
If you choose to use a paver cleaning solution, be sure to apply it to a small test area first to ensure the desired results.
The joints between the paver stones are the most vulnerable areas of the installation. Keep those joints topped off with jointing or polymeric sand to prevent the bedding sand layer below from deteriorating and causing the paver to shift. It is crucial to fill the joints in overtime.
It is crucial to be aware of the brand and series of pavers that were installed to follow proper maintenance care.
Artificial Turf Care
TIPS FOR TURF MAINTENANCE
Rinsing off any stains, spills, or animal waste promptly is crucial to keeping the turf looking at its best overtime.
If any fungi or molds grow on the turf, hydrogen peroxide can be used to neutralize and keep odor at bay.
Be sure to invest in a broom with synthetic bristles if the turf is in a high traffic area to ensure the structure is maintained.
It is crucial to be aware of the brand and type of artificial turf that was installed to follow proper care guidelines.
Concrete
CURING
It takes 24-48 hours to harden and up to a year to fully cure. Be mindful of concrete settling for at least a week after installation.
It is important to be mindful of the fact that concrete will crack overtime and is unavoidable for any concrete installation.
Plant & Irrigation Care
Watering
If wilting is occurring, water the plant!
Specific plants will require more or less water than others. Emitters on the drip irrigation can be swapped out of the irrigation system and replaced with a more appropriate emitter for the plants specified needs.
Become familiar with the irrigation system and the landscape timer.
Plants are the living element of the outdoor living space and may need different care depending on where they are located and what is surrounding them.
If additional assistance is needed, Green Acres is a great resource.
Animals
Dog urine is very acidic, especially female dogs. If animals are choosing specific plants to urinate on, it is recommended to rinse off the plant.
Lighting Care
TIPS FOR MAINTENANCE
Homeowners need to check wiring and connectors overtime to ensure they are working properly.
Bulbs will need to be replaced overtime and can be purchased at Home Depot, Lowe’s, or a local SiteOne branch.
Be mindful of the transformer and if it is compatible with light additions in the future; all transformers should only be run at 80% capacity of the wattage.
Troubleshooting lighting issues is heavily dependent on knowing the brand and type of lights that were installed.
Drainage Care
TIPS FOR MAINTENANCE
Look out for possible clogging in drains and clear if present.
Warranties & Disclaimers
Thank you for choosing Bright Home Landscapes for your project! We take pride in delivering quality services, craftsmanship, and we stand behind our work with the following warranties. Please refer to the Construction Agreement for more details regarding your warranties.
PAVERS
Our pavers come with a 10-year warranty against defects in workmanship. We will repair or replace any paver that fails to meet these standards within the warranty period.
Synthetic Turf
We provide a 10-year warranty for installation defects specific to workmanship and will repair synthetic turf within the warranty period. Damage made due to improper use or care is not covered under the warranty.
Walls
Our wall installations come with a 1-year warranty against defects in workmanship. We will repair any wall that fails to meet these standards within the warranty period.
Irrigation
We provide a 6-month warranty on fully installed irrigation systems which includes a control valve, timer, and drip or sprinkler lines. If we did not install the full system, we do not warranty irrigation.
Concrete
Bright Home Landscapes DOES NOT warranty concrete due to the probability of cracking and discoloration. We use joint stabilizers to minimize cracking, however it can be inevitable due to the nature of concrete and that it cures as it wants, which can cause discoloration.
Plants
Bright Home Landscapes DOES NOT warranty plants as continued care of them are a homeowner responsibility. Refer to the company purchased through for their warranties.
Terms & Conditions
- This warranty is only valid for the original purchaser and is not transferable.
- This warranty is only valid of the product is installed by our company or an authorized contractor of Bright Home Landscapes. If any of the work that we installed is altered due to additional services through another provider, the warranty supplied will be void.
- This warranty is void if the product is modified, altered, or repaired by anyone other than our company or an authorized contractor of Bright Home Landscapes.This warranty does not cover damages caused by natural disasters, accidents, or misuse.
- If there are items on the property that we did not install, those items are not warrantied due to the inability to guarantee the workmanship of others.
- To make a warranty claim, contact Bright Home Landscapes within the warranty period with full contact information and completion date of installation.
- Our company reserves the right to inspect and determine the cause of any issue before making a warranty claim. Our company will not be liable for any incidental or consequential damages, including but not limited to, loss of use, loss of profits, or property damage.
- This warranty supersedes all other warranties, expressed or implied, and is the sole warranty offered by Bright Home Landscapes.
Thank You
For caring for your new space
We are so thankful that you have allowed us to turn your yard into your dream outdoor living space. If you have any questions that this letter did not answer, please do not hesitate to reach out. We want our homeowners to know that there is a whole team ready to support you in whatever needs you have throughout your project. No question will ever be too silly and no concern is ever too small.
SINCERELY,
BHL TEAM